Filter & Sorting
Filter & Sorting is a simple filtering and sorting extension for WordPress in the Image Hover Ultimate. It is an advancement of the WordPress gallery. You can display the posts or your photo gallery by sorting a filterable way. This image hover extension allows users to filter posts by category, tags, post types, etc. Now, let’s see how to use this extension and embed Filter & Sorting items within your pages/posts:
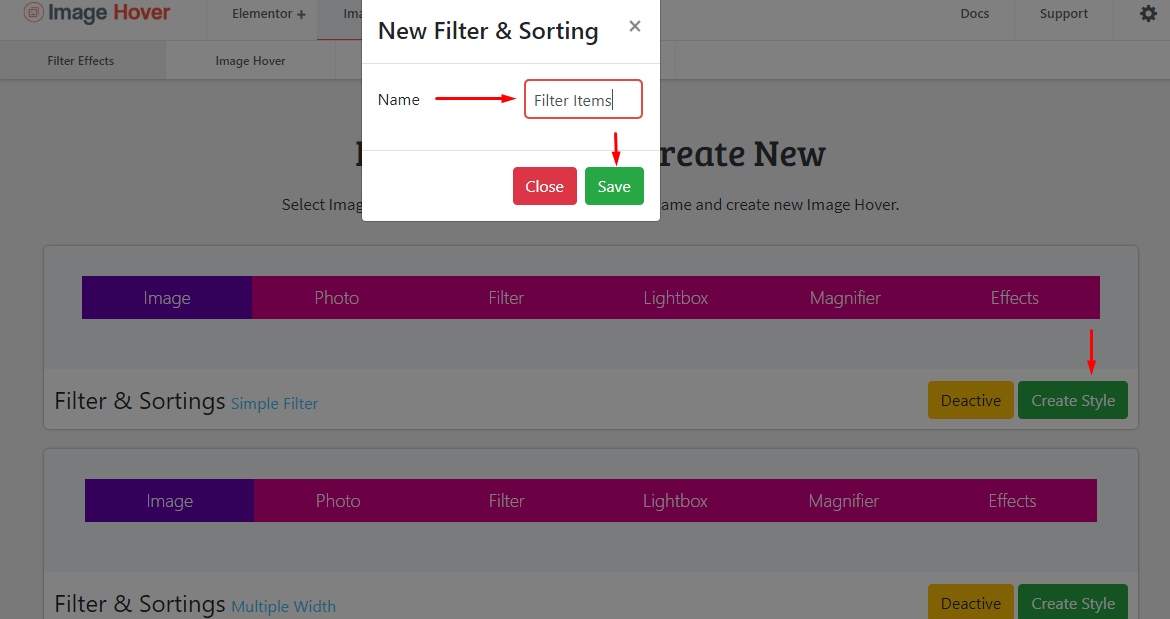
Creating a New Filter & Sorting
First, navigate Image Hover> Image Hover> Extension>Filter & Sorting from your dashboard.
Then, create a new Filter & Sorting Style by clicking on the Create Style button like below
Adding & Customizing the Data
Now, after you create a new Filter & Sorting, it’s time to go further and add/style data to your extensions. Let’s start this section:
Add New Data to the Filter & Sorting Items:
At the top left corner, click on the + symbol (Add New Data) to adding new data to the items from image hover elements. The following info you’ll need to input in order to get perfect data to show:
⇒Title: Set Title For repeating your Category Data.
⇒Image Hover Shortcode: Add an Image Hover Shortcode here. After saving, kindly reload to loading CSS or JS data properly.

Note: Here, I’ve added my own preferred shortcode for a single category. So the end result is like this. Yours may look different than me as your shortcode will be different.
General Settings
ΞCategory Menu- Here in this section, you can define the parent category for the filtering and add categories to the gallery.
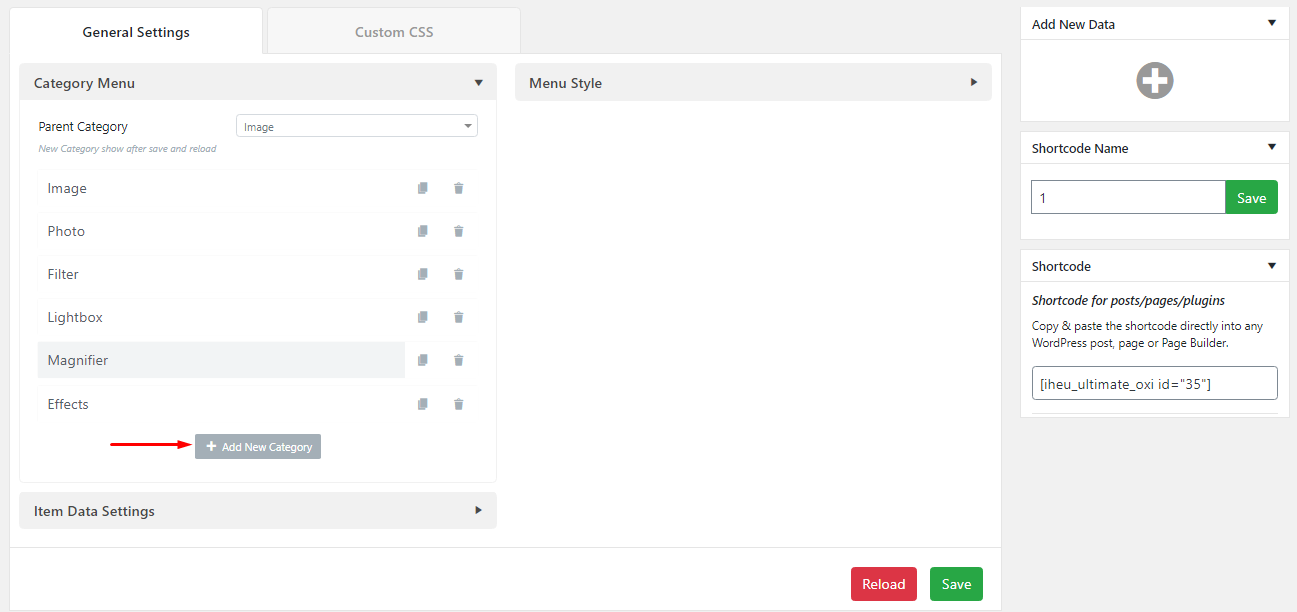
⇒Parent Category: Here at the very first in the settings panel, you can select your parent category for the filter and sorting items. For instance, if you select Image as the parent, then the image category will remain active by default.
⇒Add New Category: Add a new category or edit/delete an existing category according to your needs.
ΞItems Data Settings- In this section, you can customize the data in the filter and sorting items.
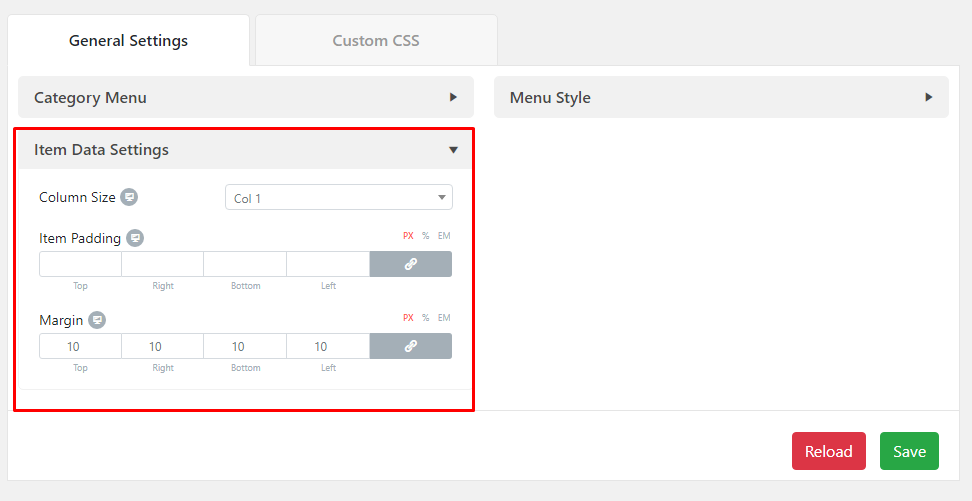
⇒Column Size: Set how many columns you want to show in a single row. Set the options for different dimensions to get the maximum responsiveness.
⇒Item Padding: Set the padding value for the top, right, bottom and left around the item’s data for different dimensions. You can link the values together or customize them individually.
⇒Margin: Set the margin value for the top, right, bottom and left around the item’s data for different dimensions. You can link the values together or customize them individually.
ΞMenu Style- And this option is for customizing the menu of the filter and sorting items.
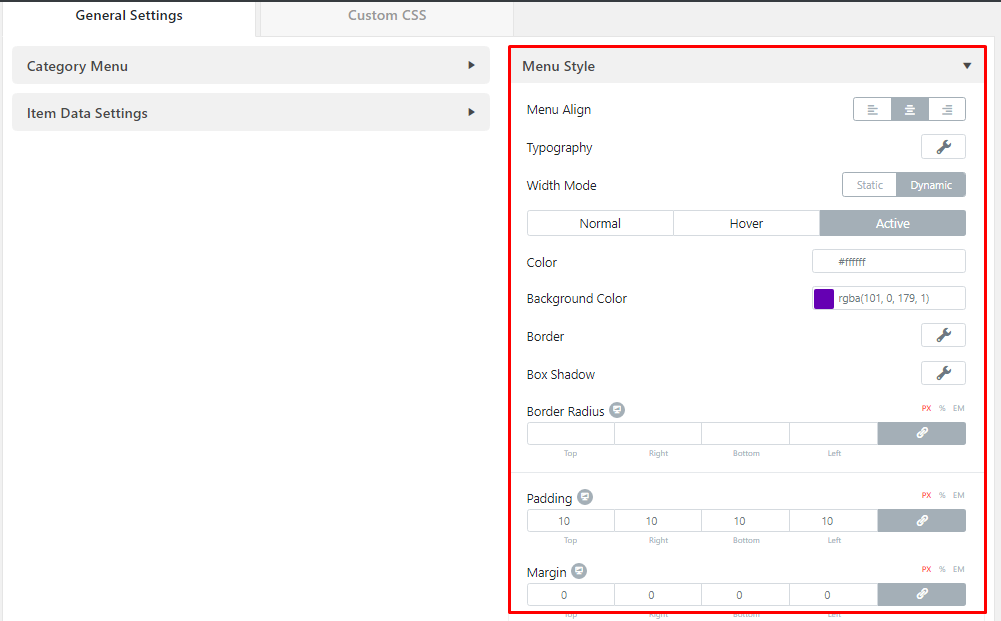
⇒Menu Align: Customize the alignment of the filter and sorting menu, either left, center or right.
⇒Typography: Set the typography options for the filter menu button texts. Here you can customize the font-family, font size, decoration, and styles.
⇒Width Mode: Set the width mode of the filter and sorting menu. If you select static, then manually customize the width of the menu. Or if you select dynamic, then the width will be set dynamically by default.
⇒Color: Add a custom color to the filter menu in the gallery for normal, hover, and active views.
⇒Background Color: Add a custom background color to the menu for both normal and hover. Know more about Background Color.
⇒Border Type: Here, select a border type from the list according to your preference. And then set the border width for the top, right, bottom and left of the filter and sorting menu for different dimensions. You can link the values together or customize them individually.
⇒Border Color: Add a custom color to the border for both normal and hover view.
⇒Box Shadow: Customize the box-shadow color, set the horizontal and vertical value of the shadow, control the blur radius and spreading, and set the position either outline or inset. Know more about Box-Shadow.
⇒Border Radius: Set the border-radius around the menu for different dimensions.
⇒Padding: Set the padding value for the top, right, bottom and left around the menu for different dimensions. You can link the values together or customize them individually.
⇒Margin: Set the margin value for the top, right, bottom and left around the menu for different dimensions. You can link the values together or customize them individually.
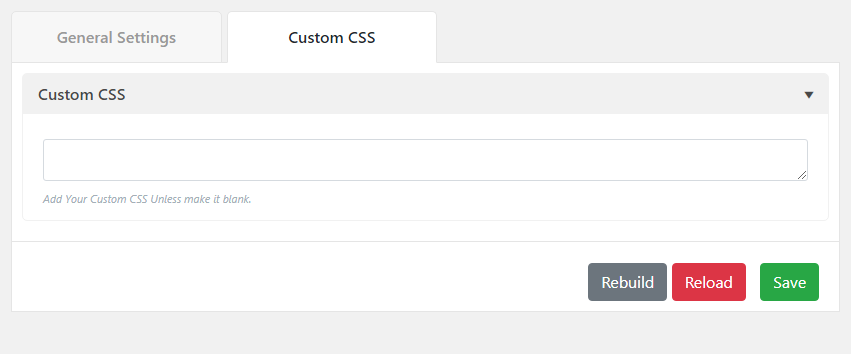
Custom CSS
Here you’ll find a box where you can add your custom CSS code. Advanced developers can use this option for their convenience. After entering the codes, developers can see the live preview by reloading the page.
Once you finish coding hit the “Save” button to make your changes.
Now, just Copy the Shortcode and Paste anywhere in the post or page or plugins where you want to show the Filter & Sorting.