Display Post
Display Posts allow you easily list post contents from all across your website. It was developed to allow users to easily display listings of posts without knowing PHP or editing template files. Here, with our Image Hover Effects Ultimate plugin, you can have this effective extension fully free with the bundle. Now, let’s see how to use this extension and embed Display Post within your pages:
Creating a New Display Post
In order to integrate WordPress post into Image Hover Ultimate, first, you need to create a shortcode using Display Post. To do so, follow the following instruction:
Navigate Image Hover> Image Hover> Extension> Display Post from your dashboard.
Now, Create a new Display Post by clicking on the Create Post Extension button like below
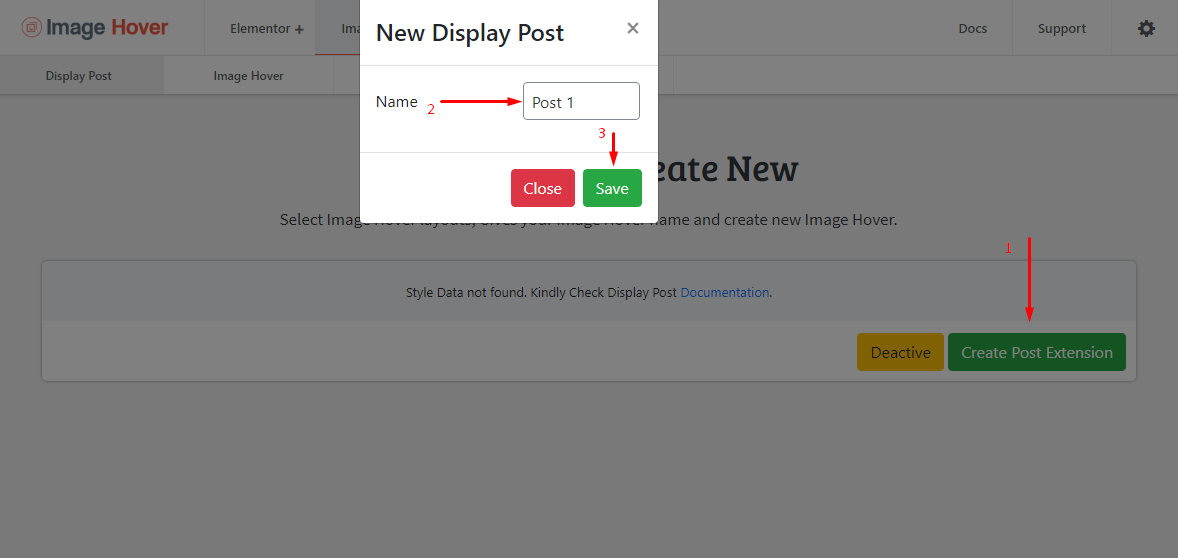
After saving the display post style, it’ll redirect you to the setting or shortcode editing page.
Customizing & Adding Data
Now, when you create a new display post, it’s time to go further and add/style data to your extensions. Let’s start this section:
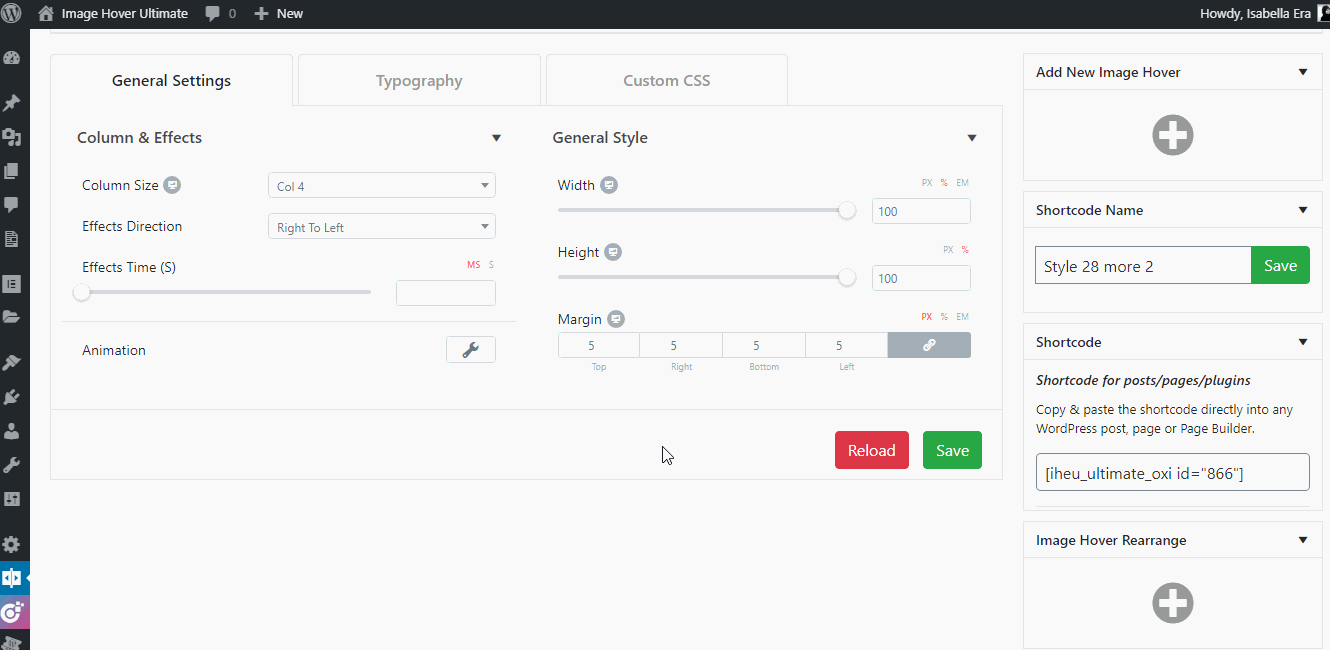
General Settings
ΞPost Query- Here in this section, you can define the primary post query of your Display Post.
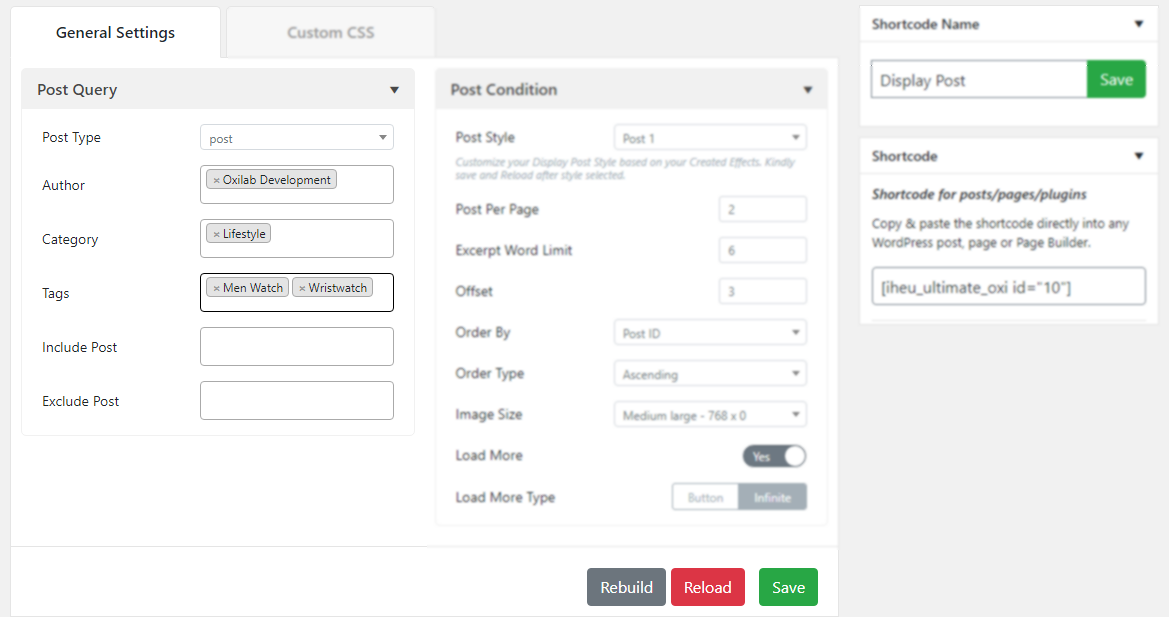
⇒Post Type: Select the post type you want to display on the Display Post. You can select either Post or Page as post type here.
⇒Author: Select the name of the author whose post you want to display in the grid.
⇒Categories: Select the category whose post/page you want to showcase.
⇒Tags: To display posts associated with a particular tag.
⇒Include: If you want to display only certain posts, then you can define the include here.
⇒Exclude: If you do not want certain posts to appear, you can simply ‘Exclude’ those contents as well.
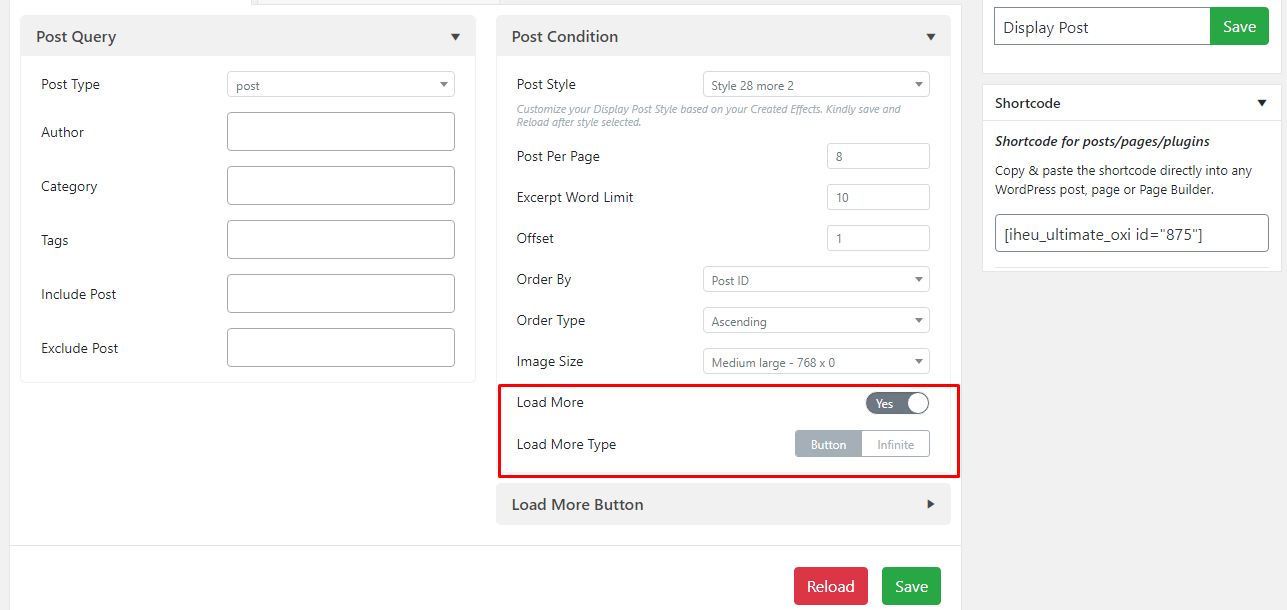
ΞPost Condition- And this section is for defining the conditions for the Display Post.
⇒Post Style: Here, confirm your image hover style how you want your post to decorate.
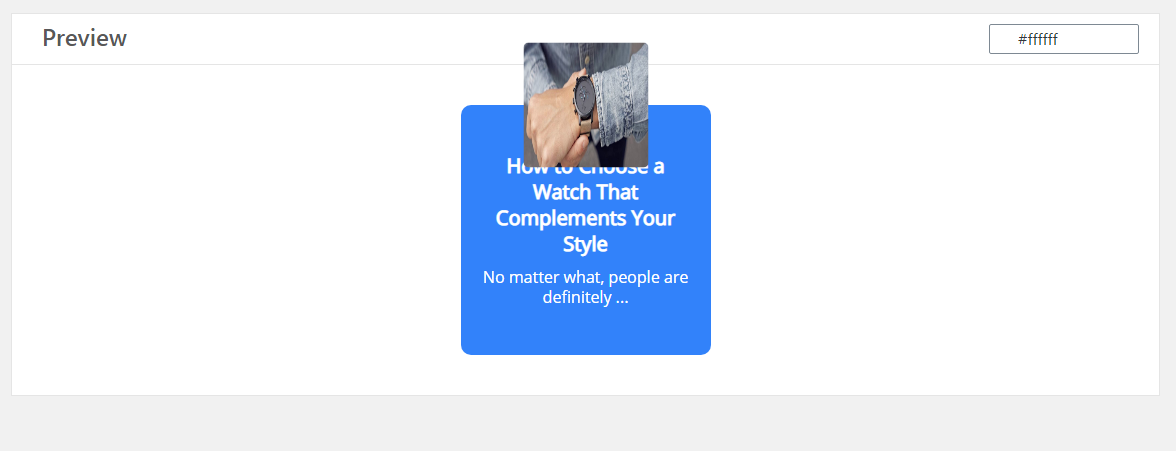
You can add an image effect on the display post by selecting a shortcode here. Customize the style of your Display Post based on your Created Effects. Kindly save and Reload after style selected to see the changes.
If you want to customize the style of the Post, then kindly go to the associated effects page and perform the edits. The style effects of the Display Post will also change after saving & reloading the page.
⇒Posts Per Page: You can restrict posts per page to display a specific number of posts on a single page of display post. It takes a numeric value which signifies the number of posts to be displayed at a time.
⇒Excerpt Word Limit: Set the excerpt word limit here.
⇒Offset: Use this setting to skip over posts (e.g. “2” to skip over 2 posts)
⇒Order By: Order your post in a certain manner. You can use different options like Post ID, Author, Date, Title, etc to filter your post.
⇒Order Type: Sort your post in ascending or descending order based on the criteria selected in Order By option.
⇒Image Size: Customize the image size using our pre-defined size set.
⇒Show Load More: Show/hide the load more button from the post. When select Show, set the type and customize the settings according to it.
When you select the Infinite Loop mode, the posts will automatically load on the page one after another. And when you select the button mode, the load more button will appear that allows manually load the display post by clicking on the Load More button.
Custom CSS
Here you’ll find a box where you can add your custom CSS code. Advanced developers can use this option for their convenience. After entering the codes, developers can see the live preview by reloading the page.
Once you finish coding hit the “Save” button to make your changes.
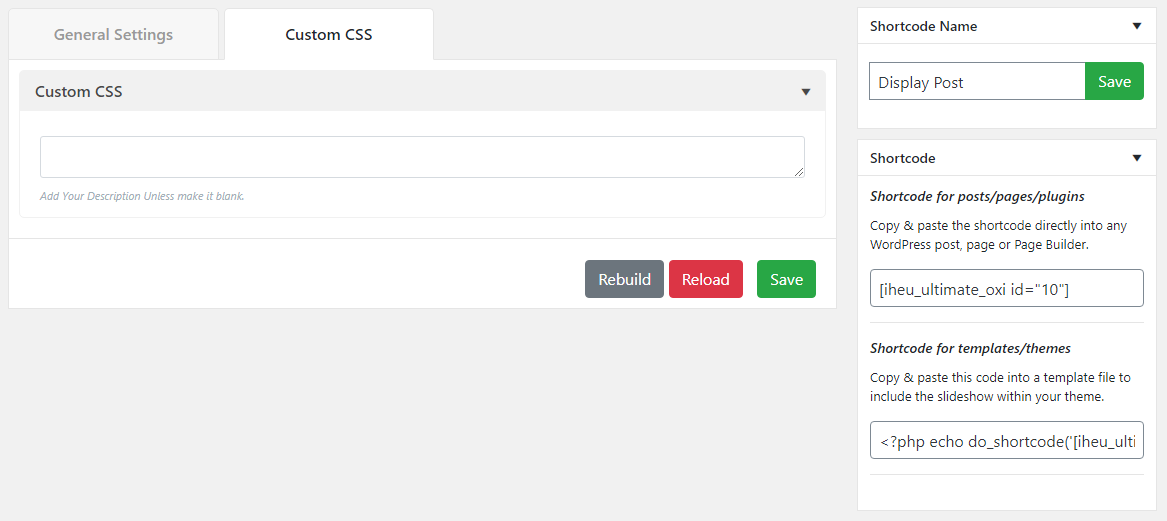
Now, just Copy the Shortcode and Paste anywhere in the post or page or plugins where you want to show the Display Post.